CALIFORNIA MISSIONS PERIOD RECIPES

Silly comments within recipes are from my sister, Cliz, the librarian, who did the research.
Red Chili Sauce

1 cup red chili pulp
3 tablespoons fat (I’m sure that means that bacon grease our grandmother’s used to leave on the stove in a cup to fry our eggs with! SICK!)
1 tablespoon minced onion
1 teaspoon minced garlic
2 teaspoons flour
Dash of oregano
Salt to taste
¼ cup water
Huevos de Chili

This eggs-in-chili dish frequently was referred to in mission days a “Oxeyes,” presumably because of the fact the eggs seem to stare out of the dish.
(But, in actuality, they WERE eyes staring at you. Remember the beef used in yesterday’s recipe? Uh-hum, exactly.)
3 tablespoons butter (or fat) (depending on whether you used bacon or not last week!)
1 tablespoon flour
1 teaspoon salt
1 clove garlic, well mashed
1 tablespoon vinegar
12 eggs
Wipe the chilies clean; split, remove stems, seed veins and seeds; place in a small kettle and cover with boiling water. Steam for 15 to 20 minutes. Remove the chilies from the water and rub through a colander, adding a little of the water in which the chilies were cooked (this aids in removing the pulp from the skins). You should have a rich red puree.
Heat the fat in a kettle, stir in the flour (or if you prefer, ¼ cup of toasted bread crumbs); stir just until the two are well blended, then add salt and garlic. Pour in the vinegar, stir and add the chili puree. Cook for 20 minutes.
Pour the sauce into a casserole, drop in eggs one at a time and allow to stand in a warm oven until the eggs are set. To garnish, sprinkle around edge with finely chopped ripe black olives and onion.
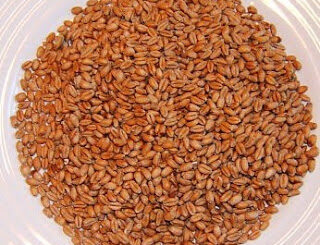
Nixtamal

The Indians in New Spain taught the Spaniards and the padres how to make nixtamal and how to use it. This is the base of many mission foods as well as Mexican foods: tortillas, tamales and tacos.
1 gallon water
1/3 cup unslaked lime (What’s unslaked? Look it up in your Funk & Wagnall’s)
2 quarts (8 cups) whole dry corn (maize)
Bring to a boil, then lower the heat so that the mixture cooks but does not boil – stir frequently. When the skins can be easily rubbed from the kernels (after about one hour of cooking) and the corn is moist through, remove from the heat.
Drain and wash in several changes of cold water until all trace of lime is removed. Rub the kernels between the hands until free of hulls.
You will have a clean corn much like hominy but not so well cooked. This is nixtamal, ready to be ground into masa.
Lime Water

Quick, or unslaked, (there’s that word again!) lime is used in making the nixtamal. The ratio is 1/3 cup lime to 1 gallon water. (Add some sugar and you’ve got lime-aide!)

1 cup nixtamal
Water
Torrejas

2 cups corn masa
1 cup white cheese (dry cottage cheese)
1 teaspoon salt
Torrejas are usually served with dishes having an abundance of gravy, or combined with a cooked red chili sauce. They may also be served with a sweet syrup.
Tortillas

Form the masa into 2-inch balls; press and pat with the hand into a 6-inch round cake. Bake on a hot, ungreased griddle until slightly brown and blistered on both sides.
 This is a nearest to ice cream that the early Californians knew.
6 eggs
1 quart milk
¾ cup sugar
Dash of nutmeg
½ cup masa (or 2 tablespoons cornstarch)
½ cup water
Champurrado (a thick hot chocolate drink)

In the early days of the missions, the Spaniards drank chocolate, and they liked it thicker and sweeter than we know hot chocolate today.
6 teaspoons grated chocolate (or cocoa)
6 teaspoons sugar
1 cup hot water
5 cups milk, scalded
Dash cinnamon or nutmeg
½ cup masa (or 2 tablespoons cornstarch)
2 eggs, well beaten
2 teaspoons vanilla
Dulce de Calabaza
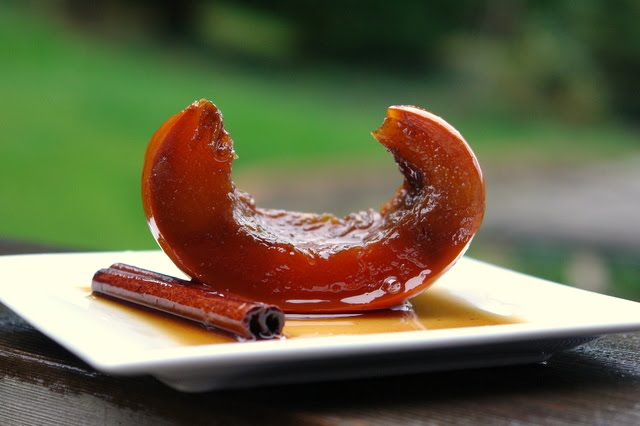
Translated, this is sweet or candied pumpkin.
2 pounds pared pumpkin
2 tablespoons (level) unslaked lime (dang!)
2 quarts water
Pare the ripe pumpkin and cut into strips the size of a finger. Drop the pieces into the clear lime water and let stand overnight. Drain the pumpkin from the lime water, cover with boiling water and boil 10 to 15 minutes. Drain.
Make a syrup with 3 cups granulated sugar and 3 cups water. When the syrup begins to boil, put in the pumpkin pieces and boil briskly until the pumpkin is transparent but firm (about 15 minutes).
Lift the pumpkin pieces from the syrup (save syrup) onto a large pan or platter and place in the sun until the next day. Then reheat the syrup in which the pumpkin was cooked, return the cold pumpkin pieces to the boiling syrup, (make sure you pick the flies off of it first), and simmer until the pieces are tender but firm. Left from the syrup and roll in granulated sugar; spread on a plate until cool.
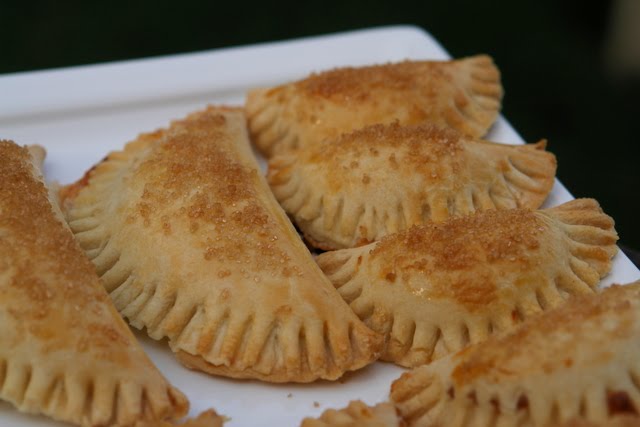
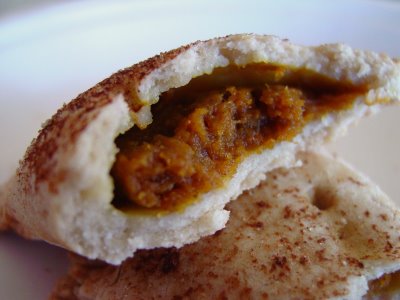
Empanaditas
1 teaspoon aniseed
1 tablespoon sugar
¼ cup water
2 cups flour
1 teaspoon baking powder
½ teaspoon salt
1 tablespoon sugar
3 tablespoons shortening
1 egg, well beaten
Relleno de Calabaza (pumpkin filling)
1 cup cooked pumpkin
¼ cup sugar
1 teaspoon aniseed
Relleno de Frijoles (bean filling)

1 tablespoon fat (hope you still have some of that fat left from your bacon!!)
3 tablespoons sugar
½ teaspoon salt
Dash of cinnamon or nutmeg
Relleno de Carne (meat filling)

1 pound rump of beef
2 green onions
1 tablespoon fat (Yikes! We’re gonna have to definitely go on a diet after all this!)
3 tablespoons sugar
¼ teaspoon salt
1/3 cup seedless raisins
1 cup ripe black olives
1 egg, well beaten
PUCHERO

2 pounds beef
3 ears fresh sweet corn
3 sweet potatoes
1 cup garbanzo beans
2 whole onions
3 fresh (or dried) tomatoes
2 green chili peppers
1 pound green string beans (tied in a bunch)
1 bundle kohl leaves (AND ALL THIS TIME I THOUGHT IT WAS A STORE AT THE MALL!!)
3 small summer squash
1 hard apple
1 hard pear
2 teaspoons salt
½ teaspoon pepper
The knuckle-bone should be left in the air and sun to dry. Cover the knuckle-bone and meat with cold water. Bring to a boil and skim.
Place all washed vegetables and fruit over the bone and meat, carefully and in order so that they will be whole when cooked. Simmer over a low heat for 3 hours – NEVER STIR.
To serve, lift out the whole vegetables onto a platter. Then place the meat on another platter. Strain the broth into a tureen. (What the heck is that?) Carry to the table while very hot.
Quantities may be cut in half but this changes and impairs the flavor. El puchero may be warmed over, and the flavor improves with keeping.
CALIFORNIA MISSION WEBSITE
A brief history of each mission is presented here.
http://missions.bgmm.com/
other sites
http://www.thecaliforniamissions.com/
http://www.ca-missions.org/
http://www.ca-missions.org/links.html
http://www.squidoo.com/california_missions
FOOD TIMELINE
Welcome to the Food Timeline! Food history presents a fascinating buffet of popular lore and contradictory facts.
http://www.foodtimeline.org/